Wednesday, December 19, 2012

Birch Stump Santa's

My mom is ridiculously creative, although she claims that she is not, and that what she can do is following directions on a pattern.   She makes us all Christmas ornaments every year and they are always beautiful.  A few years ago one of the Christmas decorations she made was Santa’s made from birch tree stumps.  I cannot remember where she got the idea, but I love them.  While I was on maternity I had asked my father for some birch stumps as I had every intention of making them as gifts for friends. 2 years later, now that I am on a Christmas craft kick, I have finally started making them.  They are actually really easy, if you have access to the birch stumps, however with the multiple coats and snow paint, they are pretty time consuming.  All it takes is paint(red, black, white, pink), and snow paint, all of which you can purchase at your local craft store.  I like Michael’s and either bring my husband, or go multiple times to make use of their coupons.  Below are the steps to make them!

Supplies required
 
Paint a few layers of white
Add a few layers of red for his hat and mix the white and red to create a light pink for the face
Add snow paint for beard, hair/hat edge, and hat tip
Paint faces and let dry!
 
They are a fabulous addition to the Christmas season decor!

Sunday, August 19, 2012

Seat belt pillow - craft of the month

I am sure I am not alone, I hate when I look in the rear view mirror and see my little guys head crooked over so far that it looks really uncomfortable. So I decided to do something about it. I found a pinterest pin about making seat belt pillows to avoid this exact problem, but there was no pattern, so I set about trying to figure out how to make one. Now it had been YEARS since I have used a sewing machine, but my mom got me one at an auction(I think she was hinting at me to do my own mending and hemming). I am pretty happy with the way it turned out. There are a few tweaks that need to be made, but for my first sewing project I am super happy!

I started with a just a rectangular shape for the inner pillow. I decided on 6 inch width by a 22 inch length, I figured that would be long enough. I sew that together and stuffed it with cut up foam stuffing, and I hand stitch the opening at the top with a slip stitch to hide the fact that it was hand sewn.

Next was to tackle the cover. It took me a while to figure out exactly how I wanted it to look. I made a larger rectangle 6.5 inches by 23 inches. I added Velcro to the opening at the bottom so that I could easily remove the pillow for washing. I added 2 tabs with Velcro on one end to attached to the belt on his car seat. The are 3 inches by 5 inches. Then I sewed it up and stuffed it with the pillow!

The first time we were able to use it was on the way home from the Papanack Zoo and it worked like a charm! Looking forward to be able to use it on our trip to Toronto next week!

Monday, June 11, 2012

Door

I was not really able to find an interesting door to take a picture of for today's photo a day. So Alexander's door seemed the best, with the name plaque made special for him by Grandma!

Best bit of your weekend

This weekend was the best weekend I have had in a long time. I got to see a bunch of friends, the weather was perfect, and we were able to go down to the beach both days. We had a blast at the splash park both days, but I think today was the best because Xander got more adventurous and was running in and out of the sprays and got soaked. He was just having the time of his life!

Saturday, June 9, 2012

Your view today

I was looking forward to today's photo a day challenge. Dave and Olivia came out today with their little man Quinn. We played at home for a little bit, then we decided to go for a walk to the local bakery for lunch and to the park at the beach so the boys could play. Once we got to the park we saw that the splash pads were open a week early. The boys had a BLAST playing in them!!

Friday, June 8, 2012

Six O'clock

Today's photo challenge was a tough one. I had a few different ideas, but I was not happy with them, so I decided to go with having a drink at 6 on Friday evening. Hopefully tomorrow I will be able to be more creative.

Thursday, June 7, 2012

Drink

Had to take today's picture of our Timmies coffee to show our support for Camp Day(which was yesterday...and I got coffee and donated for a tent). Tim Horton's camps rock! My nieces have told me so...so donate when you can!!
Wednesday, June 6, 2012

Hat

I was very excited for today's photo challenge, but I kept forgetting to take it! For months I have been wanting a hat with a face on it for Xander, and Mike found this one at Walmart. So far it's my favorite!

Tuesday, June 5, 2012

Sign

Decided to go for a run today and find a good picture for today's photo a day! It resulted in a great picture, and I got a good workout too!!

Monday, June 4, 2012

Close Up

Photo a day is close up, so of course I had to take a picture of my favorite subject when he woke up first thing in the morning! LOVE my little dude!!

Sunday, June 3, 2012

On your plate

The subject fir today's photo a day June is "on your plate". I meant to take it if breakfast, seeing as we had gone out...but of course I forgot, so a picture of dinner us what it turned out to be! Spaghetti Alfredo with garlic loaf! YUMMO!!!

Saturday, June 2, 2012

Empty

Today's photo for photo a day is "Empty". We had an impromptu birthday party for my friends little girl, so we had a small group over for the celebration. We had many empty things to choose from once dinner was finished, but seeing as I am the cupcake whisperer, I thought that the empty cupcake wrappers photo seemed the most fitting!

Evening

As mentioned in the previous post, today's photo should have been a morning subject, but when I work the early shift, mornings are rushed and hectic, so I decided to modify it to and evening shot. Doug has been wanting to go to five guys for dinner, and today seemed like the perfect day to do it. We had never been before, and like most restaurants, Fridays are super busy. Unfortunately the cashier punched in every one of our burgers wrong, and me being stubborn, was the only one who made them redo mine. I am glad they did because it was a super delicious burger, and the amount of fries you get it is ridiculous. Of course my photo subject was Xander, while he waited for our food!

Photo a day June challenge

Every month there seems to be a photo a day challenge, where someone writes a list of 1 photo to take a day. Well this month I have decided to accept this challenge. I may vary a little from the list that I have found, like today was supposed to be a photo of the morning, but airing as this morning was rushed, I decided to to it from this evening. Anyways, hopefully it will help me become more creative with the pictures that I take! I hope you enjoy them!

Tuesday, May 1, 2012

100 cupcakes!

So as you all are already aware, I am obsessed with cupcakes, and Mike thinks that we should start up a business.  He was checking out my blog at work one day after I made a post, and his works office manager happened to walk by and saw the pictures, and she and Mike set it up for me to make 100 cupcakes this month for their monthly staff birthdays. I was really nervous because I wanted to e able to pull it off and have them look and taste like professional cupcakes. 

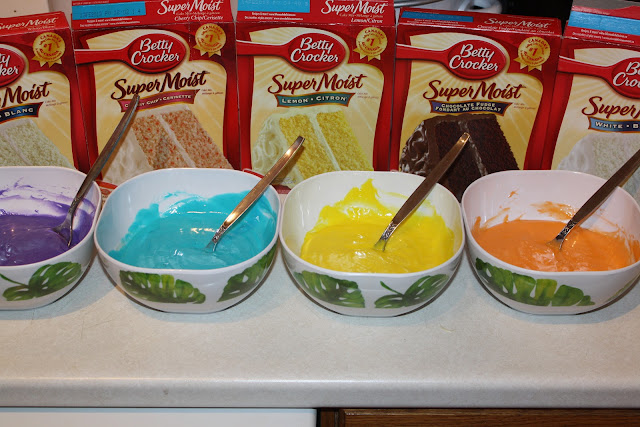
This past Wednesday I started by baking.  She wanted at least 3 flavors, so the staff had some choice.  I decided to make 5, Chocolate Fudge, Devils food cake, French Vanilla, Lemon, and Cherry Chip.  By the end of the night I had 110 cupcakes baked, and 3 batches of icing ready. 

Thursday night was decorating night.  I wasn’t sure how exactly I wanted to decorate the cupcakes, but I did know that I wanted to make them all look different.  I decided to start with the chocolate ones, seeing as I was just going to do a basic chocolate buttercream icing with sprinkles.  I decorated the 2 types slightly different so that they would be easy to see they were in fact different.  Once those were some I did the Cherry Chip.  I decided on tinting the buttercream pink and do a simple round swirl with some clear red sprinkles. 

The Lemon was next with a light yellow star swirl with white sprinkles.  The plain French Vanilla ended up with plain white icing with multi colored sprinkles, and last but not least my signature fun multi colored French vanilla cupcakes. 
 I was not as happy with the way the decorating turned out on them.  I found they looked like they didn’t fit in with the clean and simple theme I did with the other flavors.  


All in all though I am very happy with the way they turned out and I hope that they were just as happy, and hopefully this will turn into a monthly venture for us.  Finger crossed!

Thursday, April 26, 2012

Basic Cake decorating class at Michael’s – Final class

This week was our last week for class and we had to make a full cake.  We needed to prepare the cake prior to class, which ended up being a 3 layer cake. I neglected to put wax paper on the bottom of the cake pans for the first cake, so I ended up throwing out one layer that completely fell apart when I tried to take it out of the pan.  I also put chocolate pudding between each layer, and completely iced in in plain white icing.

Once we arrived at class we set up all of our materials, which I remembered everything this time!  First we learned the proper technique for printing and cursive on the cake. 
I was pretty good at that, the teacher even complimented me on it(YAY ME!).  Then we got into doing the roses.  I have been so excited to learn how to do these, but also super apprehensive due to the fact that I do not have very steady hands.  She showed us how to do one, and then let us take time to practice and then we got to finish out cakes however we wanted.  I made a total of 7 roses and was happy with most of them.  They are not perfect, but for my first time I was pretty happy.  I will definitely be practicing these because they look gorgeous when they are done correctly! 

I am super happy with my very first cake using all the techniques I have learned in class, and look forward to being able to practice and make many more!

Wednesday, April 18, 2012

Cake decorating class #3 at Michael's

This weeks class focused on cupcakes, and as you all know I LOVE me my cupcakes, so I was super excited for this weeks class!  We had to bring 6 cupcakes to decorate, icing already colored and ready to go, a batch of plain white icing, and all of our assorted tips, bags, and doodads. 

We arrived to class a little early so we could set up(yes, I am a keener in this class), and I noticed I was missing ALL my tips and doodads that came with my student kit.  Thank goodness I brought my box of tips, because I was able to substitute some of those with the ones I was supposed to use. 

We learned first how to do drop flowers, rosettes, shells, and leaves.  Once we finished practicing those we moved on to filling our cupcakes.  That is one messy job if you are new at it.  Cortney and I had blueberry filling everywhere, but we got the hang of it and although the cupcakes are probably a little too full and may explode upon eating, it seems to have worked.  Once we iced the cupcakes with plain white swirls, we learned how to do the shaggy mums. 

We had the rest of the class to practice what we learned and to decorate our cupcakes.  I am so happy I am taking this course.  I am learning so much and it is helping me make much more fun and professional looking.

Wednesday, April 11, 2012

Cake decorating at Michael’s class 2

My finished cake
Tonight there was a lot more hand on learning.  We had to come to class with a baked cake that we could level and tort, a filling of some sort for the middle, 2 batches of icing, and an assortment of doodads and thingamajigs.  Seriously I had enough stuff to bring to class(to share with Cortney as well), that it filled one of the big IKEA shopping bags.  I also wanted to buy a couple more things when we got there, and I am glad I did.  Using the new tools and being shown how to use them, REALLY makes decorating significantly easier. 

We started by leveling the top of the cake off with a cake leveler(have yet to find the cheap on I want, but I will buy it when I find it), and then we had to tort it.  I was a little apprehensive at first, thinking it was going to crumble, or fall to pieces, but it was so easy!  We then had to put a barrier of icing around the edge of the middle, and then fill it with the filling we brought.  I made and brought vanilla pudding.  Putting the top layer back on was not something that went well for me.  My cake decided to protest and it broke in half, but you can’t tell in the final product.  The icing of the full cake actually went easily for me.  Cortney had some issues with her cake crumbling, but I think it’s just a matter of patience and persistence, and then she will be able to do it with no problem, although in her defence her cake was a little crumbly to begin with.  The next step was to put an outline of the design we wanted to decorate on the cake.  This step is really neat and makes decorating so much easier as it gives you guide lines(super simple sneaky trick).  You trace with piping gel on a piece if wax or parchment paper the design you want to put on the cake.  You then flip the tracing over and place it onto the cake, rub the lines with a little brush, remove the paper, and VOILA, you now have an outline of the design to follow right on your cake!  From there the only thing you really have to think about it what colors you want to use to decorate, unless you already have that figured out.  If so then you just color in the lines and you are done!  My cake is nowhere near perfect, but for my first try I am super happy with it! It was a really great class and I learned a lot.  Next week is cupcakes, so I am super excited to learn more tricks for those!